What’s burning?
The smell of food crumbs burning is something every homeowner has experienced. The notorious scent, lets us know, the oven is ready for a good scrub down.
In a perfect world, you would wipe down your stove top after every use, and clean the inside of the oven every 3 months. Yet, if you’re like most homeowners, cleaning the oven hasn’t regularly been on the top of your to-do list.
As you approach your home inspection, you’ll need to know how to clean a stove, from top to bottom. Installed appliances are one of the first items the inspector will definitely be evaluating. So unless your planning on replacing your oven, you’ll need to learn how to make it sparkle again.
Don’t worry though! We have tips and tricks to help make this cleaning project easier than ever before. Read on to find out what cleaning supplies and methods, can help you get the job done right.
How to Clean a Stove
Cleaning your stove is a great way to protect your property value, and pass your inspection. Let’s start by helping you gather your stove friendly cleaning products.
Here’s a list of natural cleaning agents you can use to effectively clean your stove.
- Hydrogen Peroxide
- Baking Soda
- Water
- Salt
- Vinegar
You may also find yourself in need of liquid dish soap, to help expedite the cleaning process.
Preparation
As you prepare to clean your stove top, make sure the oven is completely off, and cool. Next, gently remove each burner. If you have a glass electric stove top, just make sure all cooking utensils are off the surface.
For stoves with burners, be careful to not force them out of position. If you have a stubborn one that won’t move, it’s better to leave it in place.
Next, remove the stove top’s drip pans. Place the drip pans in a sink filled with hot soapy water. You can let them remain to soak as you continue to clean to top and inside of the oven.
Stove Top Cleaning Methods
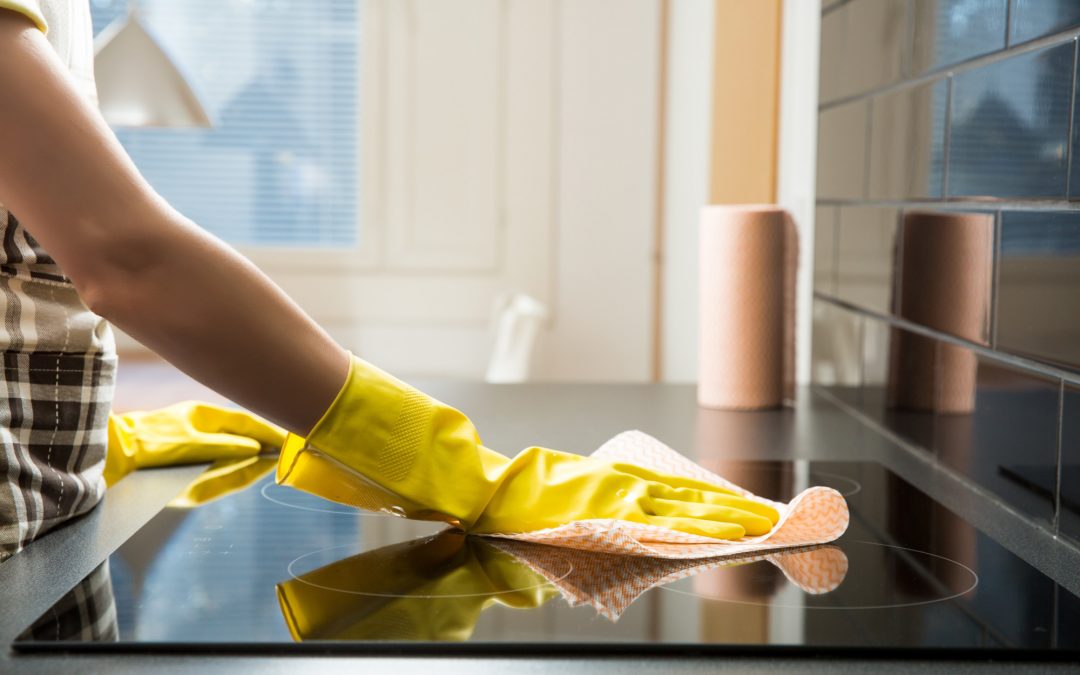
Now you’re ready to make the top of your stove shine again. Let’s look at how to clean a stove top that doesn’t have a lot of caked on debris, or stains.
Light Cleaning
If you want to eliminate the need for any cleaning products, you can use boiling hot water instead. Boil a medium sized pot’s worth of water, and bring it to a full boil.
Next, you’ll want to carefully pour the water over the stove’s surface. Grab your sponge, and really scrub any especially dirty areas.
Make sure you’re careful however not to burn your skin. If you see any stains resisting removal, use a little bit of dish soap on your sponge.
Deep Stove Top Cleaning
Baking soda and hydrogen peroxide pack a mighty punch when it comes to removing stove top stains. First, you’ll use your brush to remove the surface debris on the stovetop.
Next, you’ll sprinkle baking soda all over the top of the stove. When you’re done sprinkling the baking soda you can lightly pour peroxide in a zig-zagging motion.
The two ingredients will instantly begin working together, fizzing up, and breaking down the caked on debris. Once the fizzing is over, you can rinse the stove top off. Repeat if you see any remaining stains, yet wait 15 minutes, this time before rinsing.
Make Your Job Easier
As you get ready to clean the inside of your oven, you’ll want to gather a few cleaning tools. Here’s a suggested list of items that can make the cleaning job safer, and more efficient.
- Safety glasses
- Gloves
- Spray bottle
- Paper towels
- Cleaning Cloths
- Brillo pad or abrasive sponge
Don’t skip out on using the safety glasses. It’s common for small, hard, pieces of debris to fly up when you are scouring the bottom of the oven.
Another way to you can protect yourself, and make the job easier, is to be aware of your posture. According to Web MD, when you’re cleaning you should frequently change your position. Always stretch, take breaks, and remain aware of how your entire body’s feeling.
Inside the Oven Cleaning Methods
Let’s move on and talk about how to tackle the inside of your oven.
Preparation
The first step you’ll need to complete is to take everything out of the oven. This means you’ll need to remove all of the racks, any dishes or thermometers.
When you’re done the only thing remaining in your oven will be the mess you’re about to make disappear. Next, you’ll want to put your newspapers over the floor that’s directly beneath the oven.
Deep Cleaning Inside Oven
For a deep clean you’ll need to use baking soda and vinegar. To do this you’ll be mixing about ½ a cup of baking soda in a bowl with 3 tablespoons of water. The baking soda should have a pasty consistency.
After putting on your gloves, you can use your fingers to cover the inside of the oven. Make sure to cover the back, bottom, top, sides, and door. There shouldn’t be any corner, or nook left uncovered.
Oven Racks
Once the paste is on, go ahead and place the oven racks in your kitchen sink, or bathtub, for larger racks. Sprinkle your racks with baking soda, and pour vinegar over them as well.
You’ll notice the racks will begin fizzing and foaming. Once the foaming is over, you can add water until it covers the racks.
Soak Rinse and Scrub
Now you can remove your gloves and take a long break. You’ll have to wait 10-12 hours for the paste to do its job, and for the racks to finish soaking.
After the 12 hours have passed you can put your gloves on, and grab a wet rag. Use the rag to wipe down the inside of the oven. You’ll have to rinse the rag several times to remove all of the paste, and debris.
Use your abrasive sponge to scour any stubborn areas. Next, scrub down the racks, using the same abrasive tool. After you’ve completed cleaning the racks you can dry them and put them in the oven.
Post Inspection Questions
Now you know more about how to clean a stove when you’re preparing for your inspection. Here at CLASS Home Inspection, we understand how overwhelming the inspection process to be. That’s why it’s our goal to help our clients get the most out of every inspection we perform.
One of the ways we do this is by helping you have all the information you need throughout this process. Check out our latest article about what questions you should be asking immediately after the inspection
Knowing the right questions to ask, can help empower you to make the right decisions. All of our CLASS Home Inspections include detailed photos and descriptions of all potential issues we uncover. It’s just another one of the ways we aim to help our customers have all the answers they need.
Let us guide you through the inspection process by reaching out to us today to schedule your home inspection.